Setting the Current Working Directory for Xcode Command-Line Projects
A common problem for people using Xcode to write command-line C and C++ programs is not being able to read files. Their code to open the file uses a relative path to the file, such as the following code:
ifstream testFile;
testFile.open(“TestFile.txt”);
The code fails because the program can’t find the file TestFile.txt. The program looks only in the current directory for TestFile.txt. If it doesn’t find the file there, it stops looking, and your program fails to open the file.
If you’re using Xcode 4 or 5, you can set the current working directory for your project from the scheme editor. You can access the scheme editor from the project window toolbar. If you look at the following screenshot:

You can open the scheme editor by clicking MyFirstProject and choosing Edit Scheme. Your project will most likely have a different name than MyFirstProject.
On the left side of the scheme editor is a list of steps. Select the Run step. Click the Options button to access the area of the scheme editor where you can set the current working directory.
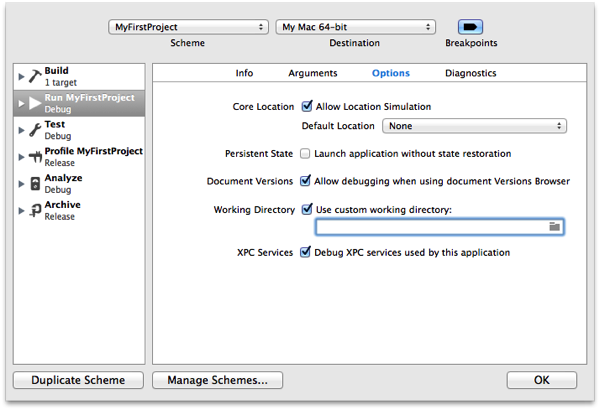
Select the Use custom working directory: checkbox to tell Xcode to use a custom working directory for your project. You can either enter the working directory path in the text field or click the Folder icon to choose the working directory.
After setting the custom working directory, build your project. Place the files you want to read in that directory, run your project, and your file reading experience should go much smoother.
Note to Mac and iOS Developers #
Setting a custom working directory is something only command-line tool projects should use. If you’re writing a Mac or iOS app with a GUI, you should load files using Cocoa’s NSBundle class or Core Foundation’s CFBundle functions.